Are you a Visual Studio subscriber? If so, you might be missing out on one of the most valuable perks available to you—$50 in monthly Azure credits! Whether you’re experimenting with cloud technologies, developing apps, or exploring Azure’s vast array of services, this subscription benefit offers an affordable way to dive into cloud computing without extra cost. This offer is part of Microsoft’s effort to empower developers and tech professionals by providing accessible cloud resources. In this post, we’ll guide you through the benefits, eligibility, and practical ways to make the most of your Azure credits.
Key Benefits
- The $50 monthly credit lets you experiment with Azure services like Virtual Machines, App Services, Azure SQL Database, Cosmos DB, and more—without worrying about incurring extra costs
- Whether you’re developing new cloud-based applications or testing hybrid cloud solutions, these credits provide a cost-effective way to use powerful Azure tools for testing, development, and continuous integration pipelines
- Take advantage of scalable services like Virtual Machines to simulate enterprise workloads or smaller instances to host personal projects and websites
Eligibility and claim credits
To claim your $50 monthly Azure credits, you need an active Visual Studio Professional or Enterprise subscription. Here’s how you can activate and start using your credits:
- Sign in Azure Portal and sign in with the Microsoft account associated with your Visual Studio subscription.
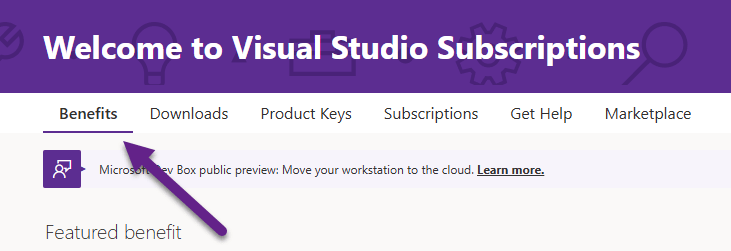
- Go to the Visual Studio Subscriber Portal, find the Azure credit offer, and click on Benefits
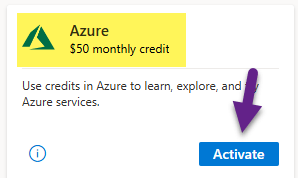
3. Fine Azure $50 monthly credit benefit listed and click on Activate
4. Once activated, in your azure portal subscriptions, you will see Visual Studio Professional subscription.

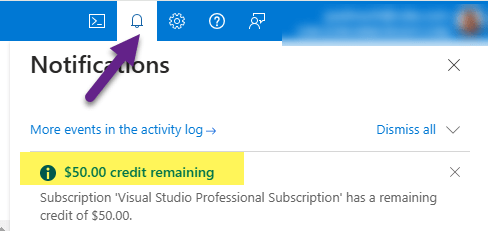
5. You will have your $50 credit balance shown in your Azure portal notifications.
Already using your Azure credits? Share how you’ve been utilizing this benefit in the comments below, and let’s discuss more ways to maximize these resources!
Happy Learning 🙂
